Update Ubuntu kernel without reboot using the free Canonical Livepatch Service. Apply critical Ubuntu kernel patches without rebooting Ubuntu. Apply critical kernel security fixes without rebooting. The Canonical Livepatch Service reduces planned or unplanned downtime while maintaining compliance and security. Livepatch is available on LTS based systems from 14.04 LTS within the normal support cycle.
(more…)
Category: Ubuntu configuration
Ubuntu configuration
-

Apply critical Ubuntu kernel patches without rebooting Ubuntu using Canonical Livepatch
-
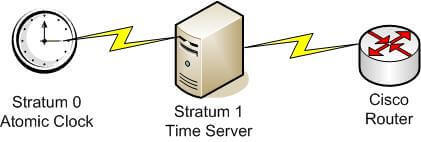
How to automatically set the correct time on the server once a day on Ubuntu and then set the correct timezone
How to set the correct timezone on the server
sudo dpkg-reconfigure tzdataRemove the old NTP server
Previous versions of Ubuntu used another NTP server.
sudo apt autoremove ntpHow to automatically synchronize the time on the server with a NTP server
The following port must be open for outgoing traffic in the firewall:
UDP port: 123Check current status:
dateTurn on NTP syncronisation:
sudo timedatectl set-ntp onThe current status of time and time configuration:
timedatectl statusCheck the status more in detail via:
systemctl status systemd-timesyncdRestart the service
sudo systemctl restart systemd-timesyncd.service -

How to activate and mount a second HDD on EC2 Ubuntu VPS
On Amazon AWS EC2 VPS server it might be useful to mount a 2. hard disk drive. Maybe your primary disk is full. This is how it’s done.
Recover data from a EC2 VPS instance with Ubuntu that won’t boot
Sometimes you need to restore files from a snapshot or a volume that wont boot. In this case the volume could be opened by mounting it as a 2. drive on a temporary EC2 instance. This procedure is useful if your EC2 instance is unable to boot. Then you can set up a new ECS VPS server and mount the non bootable disk as a second disk and extract the files from it. Need help? Don’t hesitate to contact me.

First see if the drive is attached with this command:
sudo fdisk –l
You will get a listing of available drives. If the drive already exist it will reveal itself with this line:
Disk /dev/xvdf: 10.7 GB, 10737418240 bytes
Now format the disk with this command, if you haven’t already done so:
sudo mkfs -t ext4 /dev/xvdf
Create a directory where the drive should be mounted:
mkdir /mnt
This is it. Now you can mount the drive with the command:
sudo mount /dev/xvdf /mnt
Check if the disk has been mounted correctly with this command:
mount -l
You should get this result:
/dev/xvdf on /mnt1 type ext4 (rw)
Mount on startup
Set the drive to mount automatically on system startup with adding a line to the configuration file:
sudo nano /etc/fstab
and add this line to the file:
/dev/xvdf /mnt1 auto defaults,nobootwait 0 0
Save the file and exit Nano.
Reboot the server to check that everything works correctly
After reboot you can access the new drive with the command:
cd /mnt1
mkdir /www.tbt.no
That’s it.
Your new root folder for Apache is ready for use at the address:
/mnt/www.tbt.no/
Credits
Source for this article is Mikhael Plavskiy
Alternativ address:
-
How to install Apache, PHP7 and MySQL connector
Setting up your MySQL database on Amazon RDS
Use the free MySQL WorkBench to create your database, create database user, password and assign rights on Amazon RDS.
Alternatively use Sequel Pro or use Navicat to set up your database on the Amazon RDS database server. It dos not matter which of the 3 tools you are using.
Install Apache2, PHP7, Curl and MySQL connector on Ubuntu
This will install:
- Apache
- PHP7
- MySQL database connector to access Amazon RDS. You will need this connector use the remote Amazon AWS RDS server.
sudo apt-get install apache2 php7.0 php7.0-mysql libapache2-mod-php
Install curl, gd and zip
- Curl is widly used and needed by WordShell.
- GD is needed by WordPress to change the size of uploaded images.
- Zip is a easy way to compress directories and files when backing up or moving files and directories.
sudo apt-get install curl php7.0-curl php7.0-gd zip
Apache modules to activate
sudo a2enmod rewrite
Then restart Apache to activate the change:
sudo service apache2 restart